A real night, from a real installation
See a night, in order.
August 30, 2026: 110 detections across five incursions. Sensor H recorded the first movement at 12:12 a.m. Play the night to see what followed.
First detection: Sensor H at 12:12:08 a.m. Last detection: Sensor C at 6:45:59 a.m. There were 110 detections across five groups of activity. Recorded at a monitored installation, shown as its owner sees it. Sensor positions are the actual floorplan; times are the recorded detection times.
After the replay
Find. Inspect. Compare.
- 01
Find
Start where activity starts.
- 02
Inspect
Find the physical opening.
- 03
Compare
Record the nights after the repair.
A restaurant investigation
The source was 24 feet up.
“We were focused down low. The detectors led us to the real source—an opening on the roof.”
Restaurant owner, Northeast U.S. · identity withheld at the owner’s request
Read the full investigation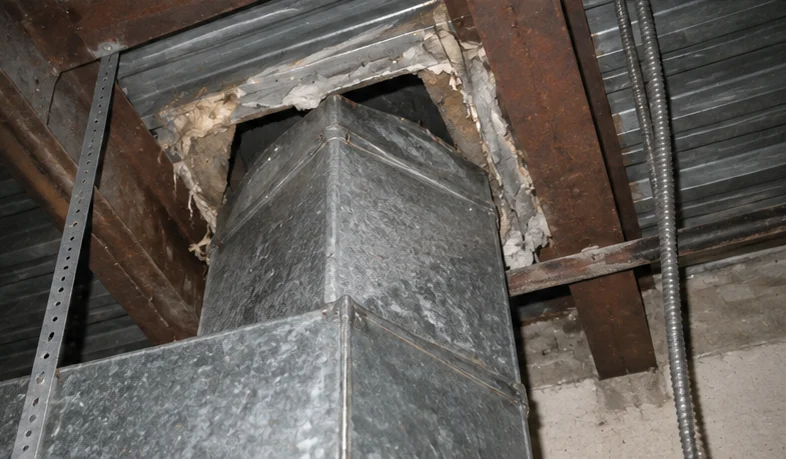
When it is worth using
Still coming back?
- 01You still hear, see, or find signs after pest service.
- 02A daytime inspection cannot explain what happens at night.
- 03You want to compare activity before and after the work.
Monitor your home for 30 days.
$295 today
$195 diagnostic + $100 refundable deposit
By day 30, choose:
Return it
$100 back
Total cost: $195
Keep it
$0 more
Your deposit pays for the kit
First year of monitoring included
$39.95/year after that
Secure checkout by Stripe. Ships to US addresses.
Full terms
The 30-day return window starts at delivery, with a shipping grace period. Postmark your return by day 30 to receive your $100 deposit back.
If you keep the kit, your deposit pays for the hardware. The included year of monitoring starts on day 31, then costs $39.95/year. If monitoring lapses, uploads stop; renew anytime.
For owner-occupied homes. Your order is placed when checkout completes; sending a contact form does not place an order. Shipping & returns · Service terms
Pest professional? See partner pricing ↗
Kit contents
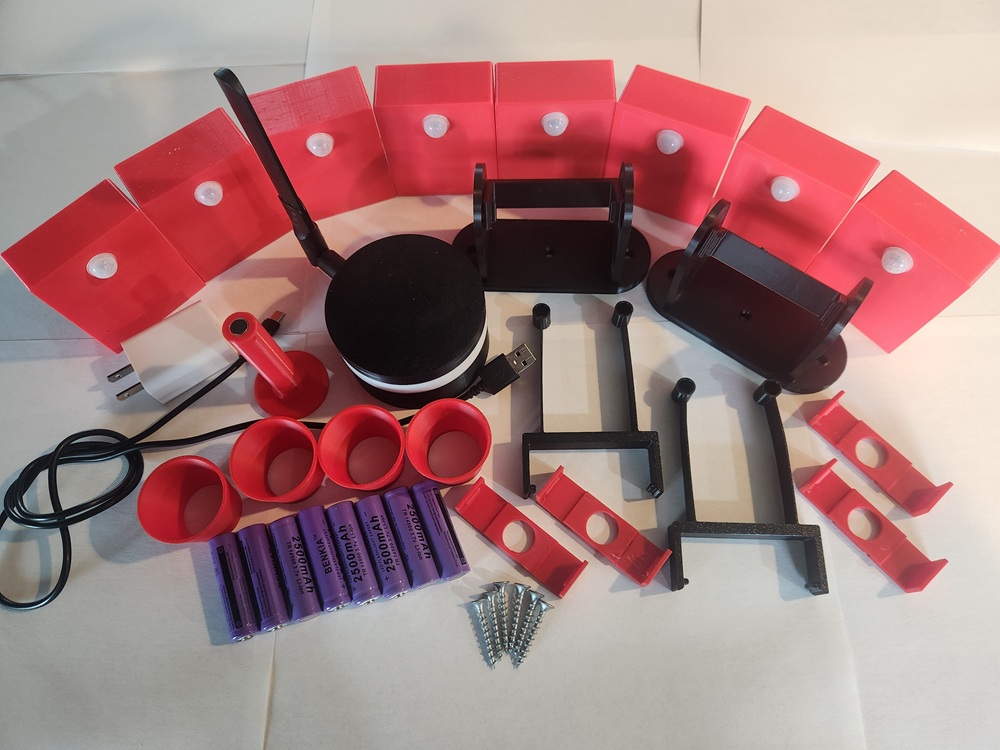
System
-
1×
Base Station
Connects to the property's 2.4 GHz Wi-Fi and receives detections from the eight sensors.
-
8×
Wireless Sensors
Battery-powered sensors labeled A through H record movement at their marked floorplan positions.
-
8×
Rechargeable Batteries
One rechargeable battery powers each wireless sensor.
Setup and power
-
1×
Activation Magnet
Swipe the magnet over each sensor to wake it before installation.
-
1×
USB Cable
Powers the base station.
-
1×
USB Wall Adapter
Connects the USB cable to a standard wall outlet.
Placement
-
4×
Detection Cones
Limit the area each sensor can detect.
-
4×
Cone Braces
Hold the detection cones in position.
-
2×
Tilt Mounts
Aim sensors up toward joists or down from higher positions.
-
2×
Grip Mounts
Attach sensors to pipes or similar surfaces.
-
6×
Mounting Screws
Secure the included mounts.
Setup card
-
1×
Quick Start Card
Includes setup steps, a parts checklist, sensor labels, LED meanings, and a grid for sketching the property.
What does RodentRadar record?
Motion at each labeled sensor, with a timestamp. It does not take photos or identify what caused the movement.
Does it show the entry point?
The replay shows where activity starts. A physical inspection finds the opening. Move sensors as the investigation develops.
What happens after the repair?
Keep recording and compare activity at the same sensors. A quiet period is a record of no detections, not a guarantee that the property is rodent-free.
Built in Buffalo
We review your overnight recordings.
Every installation includes data review: we look at your overnight replays, recommend where sensors should move next, and tell you what the pattern suggests, grounded in every installation we’ve completed.
- Based in
- Buffalo, New York
- Direct support
- (716) 868-9915
marshall@rodentradar.com - Hardware coverage
- 1-year limited warranty
Still dealing with the same problem?
Tell us what keeps happening.
Sending details creates a contact request, not an order.